
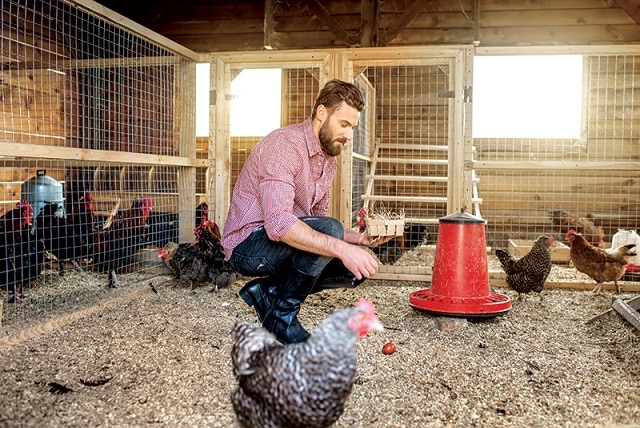
Looking after birds may not be a glamorous job but it’s an honest one that provides top-quality ingredients for your future meals. So, if you’re wondering about the best ways to properly clean a chicken coop and make sure the chicken feed is not spilled or wasted in vain, here are some tips you should take into account.
Contents
Make an inventory of the required tools and accessories
Before starting the cleaning operation, think about the size of the coops and how many people it would take for thorough cleaning. You may want to share your chores with a second person to work and finish faster, considering you will be doing this every other day.
Secondly, make a list of all the gear, tools, and accessories you’ll need to complete the cleaning operation. Don’t forget to include masks, shoes, unitards, taping knives, and shovels. You can also use protective gloves, though they might be a tad inconvenient when handling things inside the coop.

Start with the dropping boards
Once you have gathered all the necessary equipment, it is time to actually start cleaning, and you should start with the dropping boards. They are the pieces of wood you can find below the hen-roosts. They are specifically made to catch droppings deposited overnight and prevent them from getting in contact with your chicken.
This task should be performed each morning to limit the number of time that feces spend on the board and lower the risk of infections and diseases. Don’t forget that fresh feces are easier and faster to clean. If any residues remain on the roosts, you can use your taping knife to remove them.
Evaluate the bedding
Once the boards are clean, you can proceed and check the condition of your hens’ bedding. If it is visibly soiled or has specific odors, you should get rid of it immediately. However, avoid adding a new layer immediately without having previously cleaned the surface for any residues left.
If the bedding is in good condition, all you have to do is put in the sun for a short while to dry it out. Heat will also kill mold, pathogens, and bacteria, preventing your hen from getting sick. Don’t forget that a happy, clean, and unstressed hen produces more eggs so that the entire cleaning operation is worth the trouble at the end of the day.
How is deep cleaning different?
Getting rid of feces is just one part of cleaning the chicken coop and keeping it this way for long. The thorough cleaning process starts with removing all the chickens from the coop so you’ll have enough space to wash and dust away every corner of the construction.
Now would be a good time to have a partner as he or she could look after the chickens and clean them while you continue your work inside the coop.
The second step in your thorough cleaning should be removing everything from the floor. Dirt, bedding, drops, and debris should be raked out or shoveled to reveal a neat surface. Don’t forget to also get rid of tools standing in your way.
All the equipment inside the coop, including the waterer, the feeder, roosts, and nesting boxes (if any) should be removed and cleaned using an organic, non-toxic household solution. Before placing any of these items back in their place, make sure to wipe the floor using a broom and get rid of any debris or dirt you might have missed the first time.
The power of water
Although the water used won’t have any healing properties, it still remains the best option for thoroughly cleaning the coop. Use a high-powered hose to wash the floor and the rest of your chicken coop, insisting on corners and other surfaces that are normally harder to reach.
The water won’t only refresh the coop but will also soften the dirt or manure attached to the floor, getting rid of any other substances that might cause health problems in your hens.
Once you’re down with the hose, allow at least one hour for the water to drain before adding the chickens back. You can consider mopping the remaining water if the weather isn’t hot enough to allow natural drying within a reasonable time.

User proper coop substances
Make sure to pick an organic or non-toxic coop cleaner that you can spray across the entire surface of the floor and on any corners or edges. Walls should receive similar treatment if there are signs of blood, droppings or grime.
With the help of a stiff-bristled brush scrub all the dirty areas in the coop using wide, circular motions.
Don’t forget about DE
Diatomaceous earth or commonly known as DE is a fine powder made of diatoms (basically fossilized algae) that is used to prevent and kill parasites and pests such as digestive worms, ticks, mites, fleas, and others.
Choose the perfect amount of DE based on the size of your coop and sprinkle the substance on the floor so that it covers the entire area of the building. You can use a small spoon or your hands, as long as you spread it evenly on all areas.
Be extra careful when handling diatomaceous earth as it can cause severe lung inflammation if you inhale it. You should always use proper protective equipment at this stage – masks and gloves are mandatory, especially when handling different substances and cleaning products.
It is now time to put back all the objects inside the coop and add new bedding, food, and water supplies, if necessary. Once everything is sparkling clean, you can invite your chickens back in.
The entire operation can take a few hours but is necessary at least once a month. This is the equivalent of a general cleaning inside the house and should be followed by smaller operations every other day or as often as necessary.

Leave a comment
0 Comments